I worked with animator, Tim Wheatley, on a project for Pleasance at the Fringe Festival; it was a film to be projected in the Pleasance Courtyard as part of the visual effects. We came up with the idea of following a group of high-five-ing, intrepid mice on their epic road-trip from Cornwall to Edinburgh, picking up all their hitch-hiking rodents as they go. Theres nothing like a road trip... The Mice Are Out!
I loved making the film, shot with a mixture of stop-motion, (often taking a mouse each) and film footage using a Go-pro camera, which adds to what we came to think of as the 'quality-cheese effect' which I guess is the knowingly home-made, sort of natural feel of the film. We edited using After Effects.
To find out more about our mice go to:
facebook.com/pages/The-Mice-are-Out/108829615885661?sk=wall&filter=3
The Mice are Out! from Poppy Rand on Vimeo.
Thursday, 30 August 2012

Friday, 10 August 2012
Another direction for the summer
Looking back at old A-level work I thought that it would be very interesting to try out more charcoal drawing, going back to the beginning of my work and Fine Art. I have started taking photos of my favourite trees and I plan to make a collection of their drawings. I love working with charcoal, crushing it up in fabric to use like a powder and then building up layers of depth. Here is how I've started...




Final Characters!
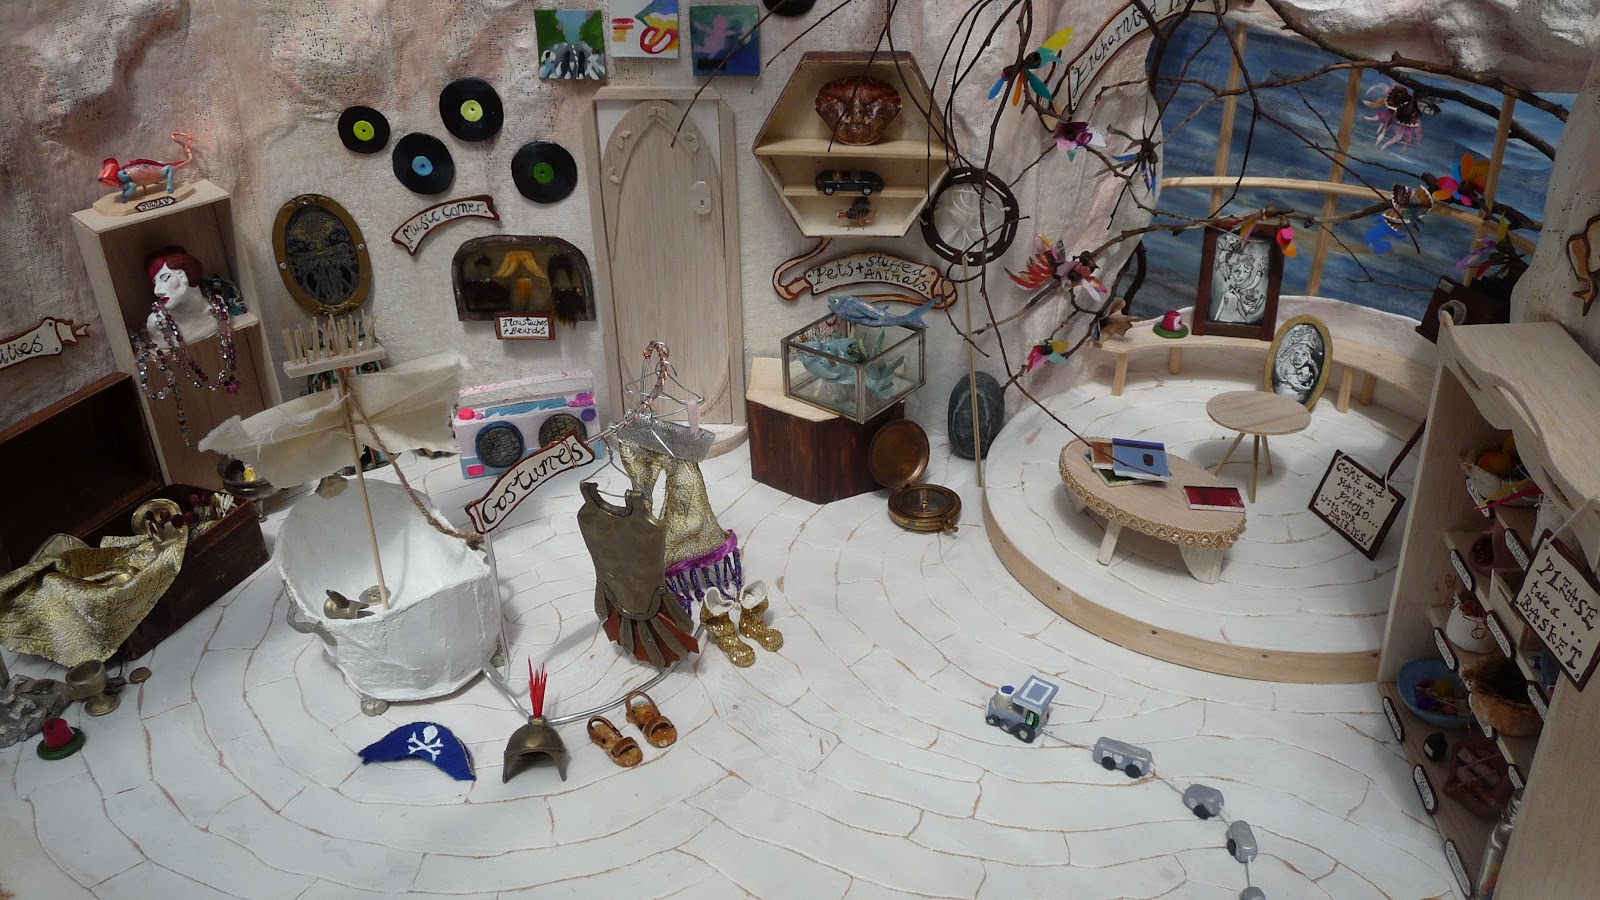
This was finished by the end of term!... here is a catch-up...I'm glad I did this project as it means I would't think twice before making smaller sets to photograph for illustration, as it feels like I could build on what i've learnt. I think i've set myself up with some good prop-making skills and next, some adult illustration might help me broaden how I think in 3D.
Here are some photos!


 |


Tuesday, 8 May 2012
Rough Plasticine Character Design for ebook!
I spent this afternoon playing with plasticine! It was very satisfying, I've never used it for faces before, I always used Daz an air dry clay, so it was brilliant as you don't have to be so careful with it as there is no water involved. I like to be able to paint faces, thats why I've always used clay, but I was surprised how easily plasticine blends. I could experiment with that as I need her face to be malleable for stop motion.


 |
| Softer hair is appealing, I might opt for that. |


Next Stages! 3D set
This week I have been working on ideas for the ebook to go with this set. There are lots of different clips of animation I could plan so that people could explore the shop and watch and read the story that surrounds it. I have also done the next stages of building!


 |
| I had a lot of fun with the floor, I used polyfila, and once it was dryer, I scraped into it to create a white washed wooden floor. It was time consuming but I think its effective! |

 |
| I had to steam the wood again so that the bay window could have a curved middle bar, I used a lot of super glue to hold the bars in place. |

 |
| I added colour to the walls with watered down acrylic. I went for a warm palette. |


Thursday, 3 May 2012
3D SET!
I started building my set this last week, its very exciting and theres always a small problem to be thought through. I've learnt about materials as I went so here is a sped up version of the stages. After many hours sawing, discovering a longing for many power tools, and lots of decisions about the overall shape of the space this is where i've got to!


 |
| I used a straight saw to cut my base and sides to the right size and a hack saw for the corners. |
 |
| For my circular platform, where my character will sit overlooking her shop from, I had to use a straight saw to cut the edges of before using the hack saw... It took quite a while...but was very satisfying. |
 |
| A circle at last. |
 |
| After gluing my sides on and hammering little nails into place, I steamed a small piece of dowel so that it would bend around my circular platform. |

 |
| Here are some experiments with polyfilla. I will use it on the floor to add texture, such as wooden flooring. |
 |
| I spent a while cutting out my bay window in thick cardboard, I was worried it wouldn't bend or would lose shape because of the cut window, but it held its shape woo! I nailed it to the base. |
 |
| I wanted to create warped and bumpy walls to make it less harsh and more weathered looking, so I glued paper onto the walls in shapes that followed the curves of the walls before covering them with mudrock. I love mudrock its perfect for softening looks and the joins work as wall paper joins. |
 |
| I mainly include this because of the twinkle on the paintbrush... It was lovely being able to work outside in the sun for a while! |


 |
| Here I'm polyfilling the floor so that I can scrape in a wood plank effect, which follows the curves of the walls and where I will position the artefacts in the shop. I like the idea of creating a path in the shop and stuffing it full to the brim, in curves. I ran out of filler, so now I'm off to Trago. |
Subscribe to:
Posts (Atom)